




最新下载


热门教程
- 1
- 2
- 3
- 4
- 5
- 6
- 7
- 8
- 9
- 10
编写 Jenkins 脚本化流水线 (Scripted Pipeline)
时间:2026-09-04 19:53:50 编辑:袖梨 来源:一聚教程网
编写 Jenkins 脚本化流水线 (Scripted Pipeline)并不只看表面做法,关键还要理解相关条件、限制和后续影响。
简介
Jenkins 支持两种流水线风格。声明式流水线 (Declarative Pipeline) 使用结构化的 pipeline { ... } 块,而脚本化流水线 (Scripted Pipeline) 则使用包含 node、stage 和步骤调用的 Groovy 代码。当工作流需要更直接的 Groovy 控制流时,脚本化流水线非常有用。
在本实验中,你将创建一个名为 scripted-pipeline-demo 的流水线任务,运行一个简单的脚本化流水线,然后通过添加 if 条件判断和 try/finally 清理块来更新它。
编写基础脚本化流水线
在此步骤中,你将编写第一个版本的脚本化流水线。node 块会请求 Jenkins 分配一个执行器 (executor) 和工作空间。在块内部,stage 用于定义工作流中可见的阶段,而 sh 则用于执行 shell 命令。
创建 /home/labex/project/scripted-pipeline.groovy 文件:
cat > /home/labex/project/scripted-pipeline.groovy <<'GROOVY'
node {
stage('Prepare') {
echo 'Preparing scripted pipeline'
sh 'pwd'
}
stage('Build') {
echo 'Building with scripted syntax'
sh 'echo Compiling scripted pipeline demo'
}
}
GROOVY
打印文件内容并显示行号,以便检查结构:
nl -ba /home/labex/project/scripted-pipeline.groovy
你应该能看到一个包含 Prepare 和 Build 阶段的 node 块。
从脚本创建流水线任务
在此步骤中,你将创建一个 Jenkins 流水线任务,并将 Groovy 脚本内联存储在其中。Jenkins 流水线任务以 XML 格式保存在 /var/jenkins_home/jobs 目录下。我们将使用 Python 对 Groovy 脚本进行 XML 转义,以确保引号和花括号等字符能被安全地保存到任务配置中。
生成流水线任务配置:
python3 - <<'PY'
from html import escape
from pathlib import Path
script = Path("/home/labex/project/scripted-pipeline.groovy").read_text()
config = f"""<?xml version='1.1' encoding='UTF-8'?>
<flow-definition plugin="workflow-job">
<actions/>
<description>Run a Jenkins scripted Pipeline example.</description>
<keepDependencies>false</keepDependencies>
<properties/>
<definition class="org.jenkinsci.plugins.workflow.cps.CpsFlowDefinition" plugin="workflow-cps">
<sandbox>true</sandbox>
</definition>
<triggers/>
<disabled>false</disabled>
</flow-definition>
"""
Path("/home/labex/project/scripted-pipeline-config.xml").write_text(config)
PY
将任务配置复制到 Jenkins 并重新加载:
docker exec jenkins mkdir -p /var/jenkins_home/jobs/scripted-pipeline-demo
docker cp /home/labex/project/scripted-pipeline-config.xml jenkins:/var/jenkins_home/jobs/scripted-pipeline-demo/config.xml
/home/labex/project/reload-jenkins.sh
确认 Jenkins 可以加载该流水线任务:
curl -fsS http://localhost:8080/job/scripted-pipeline-demo/api/json | grep -o '"name":"scripted-pipeline-demo"'
运行脚本化流水线
在此步骤中,你将触发流水线任务并检查结果。Jenkins 使用 crumb 来保护 POST 请求,因此第一个命令会请求一个 crumb 并复用匹配的 cookie jar。
触发第一次构建:
CRUMB=$(curl -fsS -c /tmp/jenkins-scripted-build.cookies 'http://localhost:8080/crumbIssuer/api/xml?xpath=concat(//crumbRequestField,":",//crumb)')
curl -fsS -b /tmp/jenkins-scripted-build.cookies -H "$CRUMB" -X POST http://localhost:8080/job/scripted-pipeline-demo/build
等待构建 #1 完成:
until curl -fsS http://localhost:8080/job/scripted-pipeline-demo/1/api/json >/tmp/scripted-build-1.json 2>/dev/null && grep -q '"building":false' /tmp/scripted-build-1.json; do
echo "Waiting for scripted pipeline build #1..."
sleep 3
done
检查构建结果:
curl -fsS http://localhost:8080/job/scripted-pipeline-demo/1/api/json | grep -o '"result":"SUCCESS"'
成功的结果证明 Jenkins 接受了脚本化流水线语法并执行了 shell 步骤。
添加 Groovy 控制流
在此步骤中,你将使用 Groovy 控制流更新脚本化流水线。if 块决定是否运行 Test 阶段。try/finally 块确保即使某个阶段失败,清理消息也会执行。
用更丰富的功能版本替换流水线脚本:
cat > /home/labex/project/scripted-pipeline.groovy <<'GROOVY'
node {
def runTests = true
try {
stage('Prepare') {
echo 'Preparing scripted pipeline'
sh 'pwd'
}
stage('Build') {
echo 'Building with scripted syntax'
sh 'echo Compiling scripted pipeline demo'
}
if (runTests) {
stage('Test') {
echo 'Tests enabled by Groovy condition'
sh 'echo Running scripted pipeline tests'
}
}
} finally {
echo 'Pipeline cleanup complete'
}
}
GROOVY
重新生成任务配置并重新加载 Jenkins:
python3 - <<'PY'
from html import escape
from pathlib import Path
script = Path("/home/labex/project/scripted-pipeline.groovy").read_text()
config = f"""<?xml version='1.1' encoding='UTF-8'?>
<flow-definition plugin="workflow-job">
<actions/>
<description>Run a Jenkins scripted Pipeline example.</description>
<keepDependencies>false</keepDependencies>
<properties/>
<definition class="org.jenkinsci.plugins.workflow.cps.CpsFlowDefinition" plugin="workflow-cps">
<sandbox>true</sandbox>
</definition>
<triggers/>
<disabled>false</disabled>
</flow-definition>
"""
Path("/home/labex/project/scripted-pipeline-config.xml").write_text(config)
PY
docker cp /home/labex/project/scripted-pipeline-config.xml jenkins:/var/jenkins_home/jobs/scripted-pipeline-demo/config.xml
/home/labex/project/reload-jenkins.sh
确认更新后的任务配置包含新的 Test 阶段文本:
docker exec jenkins grep -n 'Tests enabled by Groovy condition' /var/jenkins_home/jobs/scripted-pipeline-demo/config.xml
查看更新后的流水线日志
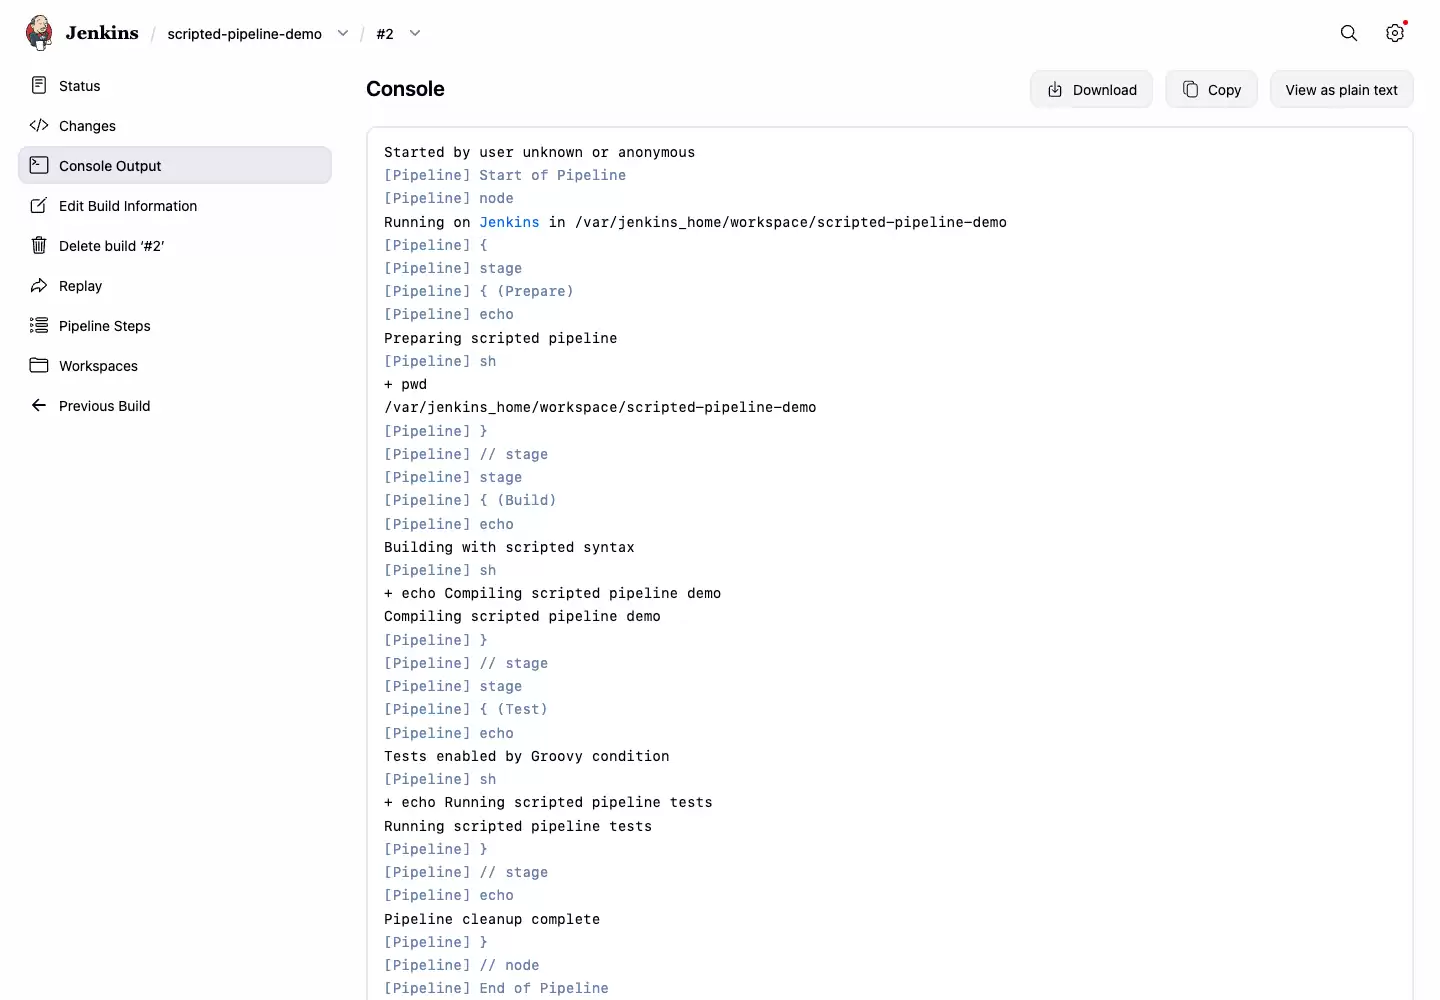
在此步骤中,你将运行更新后的脚本化流水线并查看控制台输出。日志应显示条件化的 Test 阶段消息以及来自 finally 块的清理消息。
触发第二次构建:
CRUMB=$(curl -fsS -c /tmp/jenkins-scripted-build.cookies 'http://localhost:8080/crumbIssuer/api/xml?xpath=concat(//crumbRequestField,":",//crumb)')
curl -fsS -b /tmp/jenkins-scripted-build.cookies -H "$CRUMB" -X POST http://localhost:8080/job/scripted-pipeline-demo/build
等待构建 #2 完成:
until curl -fsS http://localhost:8080/job/scripted-pipeline-demo/2/api/json >/tmp/scripted-build-2.json 2>/dev/null && grep -q '"building":false' /tmp/scripted-build-2.json; do
echo "Waiting for scripted pipeline build #2..."
sleep 3
done
打印重要的控制台行:
curl -fsS http://localhost:8080/job/scripted-pipeline-demo/2/consoleText | grep -E 'Tests enabled|Running scripted pipeline tests|Pipeline cleanup complete|Finished: SUCCESS'
从桌面界面打开 Firefox 并访问 http://localhost:8080/job/scripted-pipeline-demo/2/console。控制台页面应显示 Test 阶段的输出和清理消息。
总结
你编写了一个包含 node、stage、echo 和 sh 步骤的 Jenkins 脚本化流水线,将其作为流水线任务运行,并添加了 Groovy 的 if 和 try/finally 控制流。你通过 Jenkins 构建结果和控制台输出验证了两个版本的流水线。
相关文章
- mcjs网页版即点即玩-mcjs极速秒玩入口 10-23
- 超星学习通网页版登录-超星学习通官网入口 10-23
- poki免费游戏大全-poki免费游戏在线畅玩入口 10-23
- mc.js官方在线入口 10-23
- 海角haijiao社区2025全新网址一键直达-海角社区最新官方入口地址 10-23
- 王者荣耀世界体力上限与恢复方法详解 王者荣耀世界体力机制全面解析 10-20