






平时做技术实践时,很多问题不是概念不会,而是细节没串起来。拿“PyCharm 接入 DeepSeek最新实践教程”来说,它看着像小点,放到项目里常会牵出环境、配置、兼容性和维护成本。下面按实际使用顺序,把思路、关键写法和容易踩坑的地方讲清楚,方便你直接对照操作。
DeepSeek-V3
结合项目来看,DeepSeek-V3是一个拥有671B参数的MoE模型,吞吐量每秒达60 token,比上一代V2提升3倍;在数学代码性能上,堪比国外大模型Claude 3.5 Sonnet。
理解这一步时,接下来,我们把DeepSeek接入到PyCharm中,同时借助其能力辅助我们进行代码开发。
效果演示
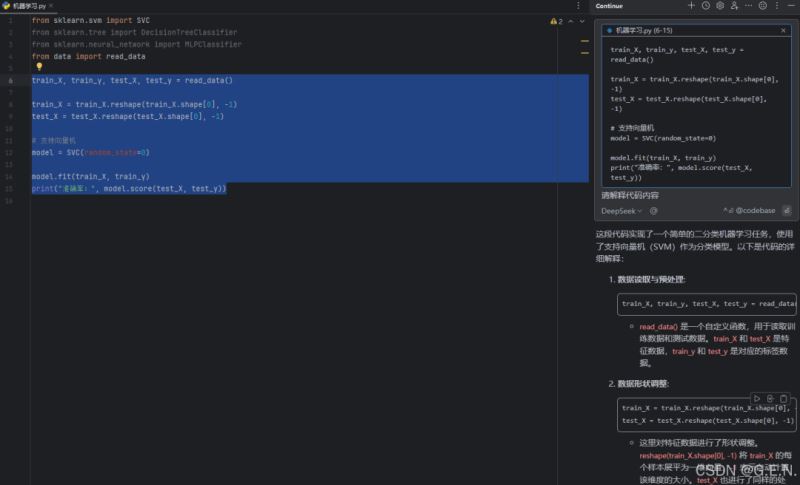
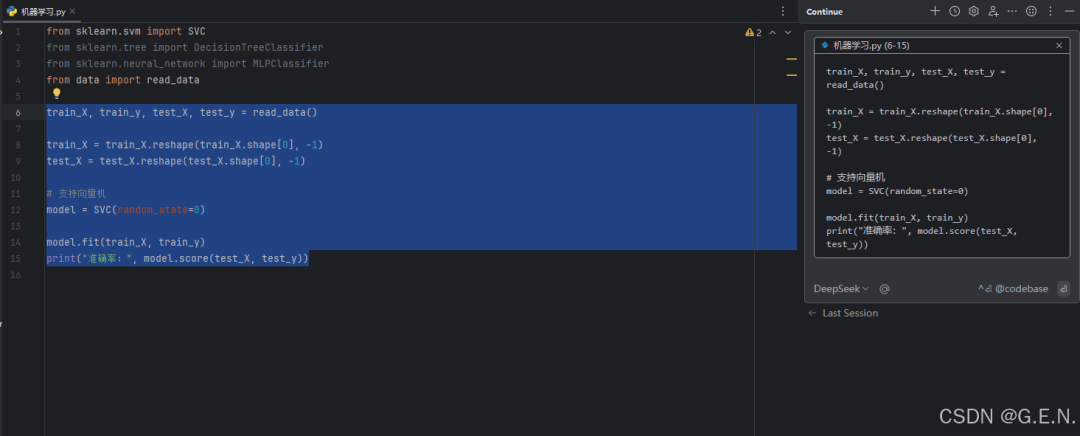
首先来看一下效果。
我们可以直接选中代码,并对代码段进行解释。
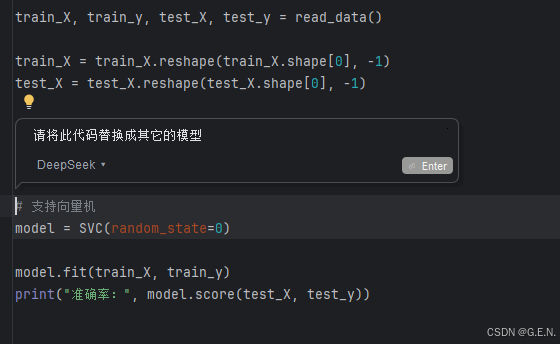
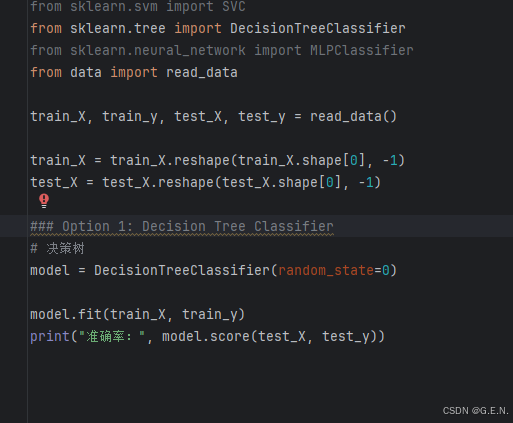
我们也能够借助选中代码,对代码进行修改。
新建API Key
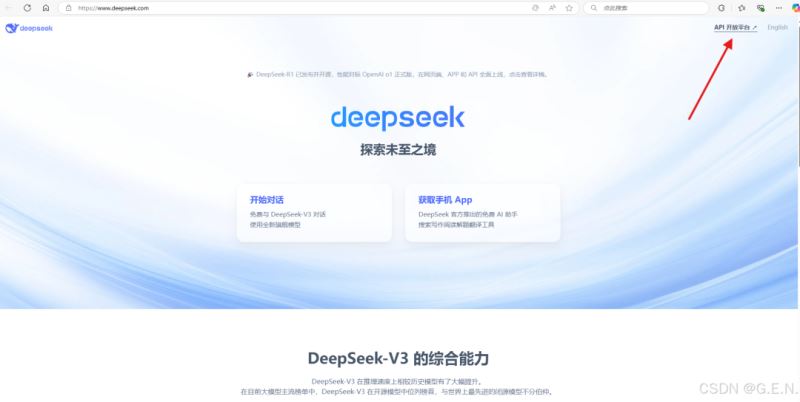
首先进入DeepSeek官网,官网链接如下所示
(链接已移除)
点击API开放平台:
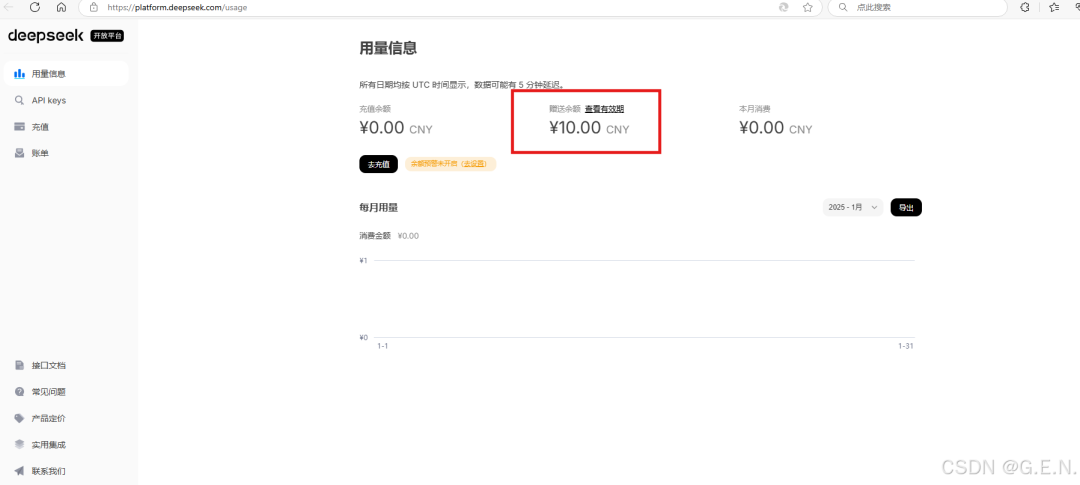
在这个场景下,点击左侧“API Keys”,点击新建 API key,输出名称为“AI 代码提示”,也可以采用其它自定义的名称。
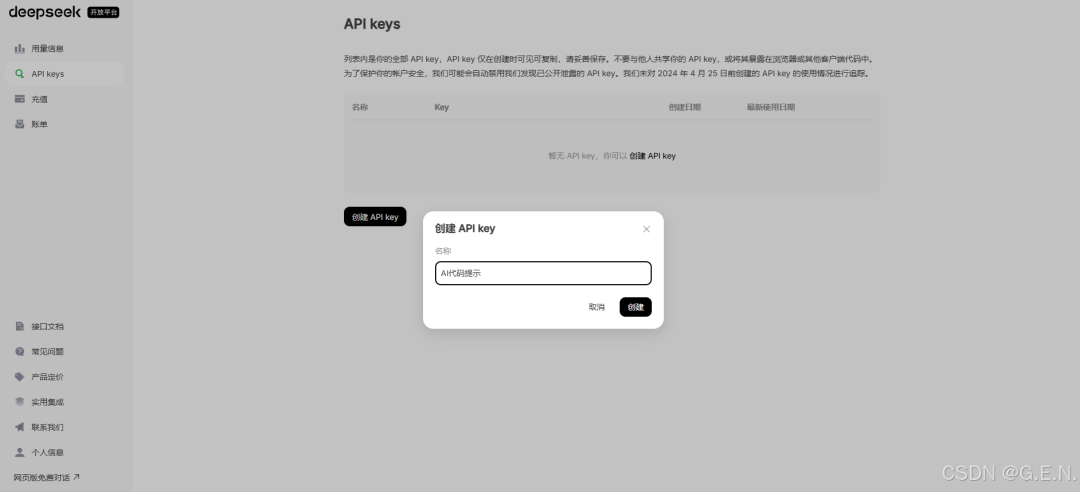
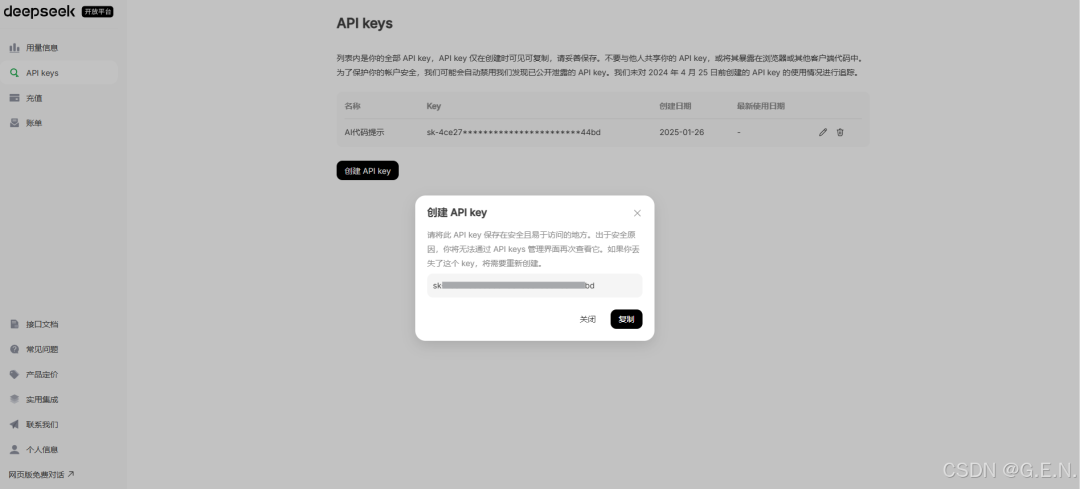
在这个场景下,点击“新建",一定要记录此处的 API key,可以先将 API key 复制在其它地方。
在PyCharm中下载Continue插件
在这个场景下,打开PyCharm,打开文件->设置->插件,搜索“Continue”,点击安装。
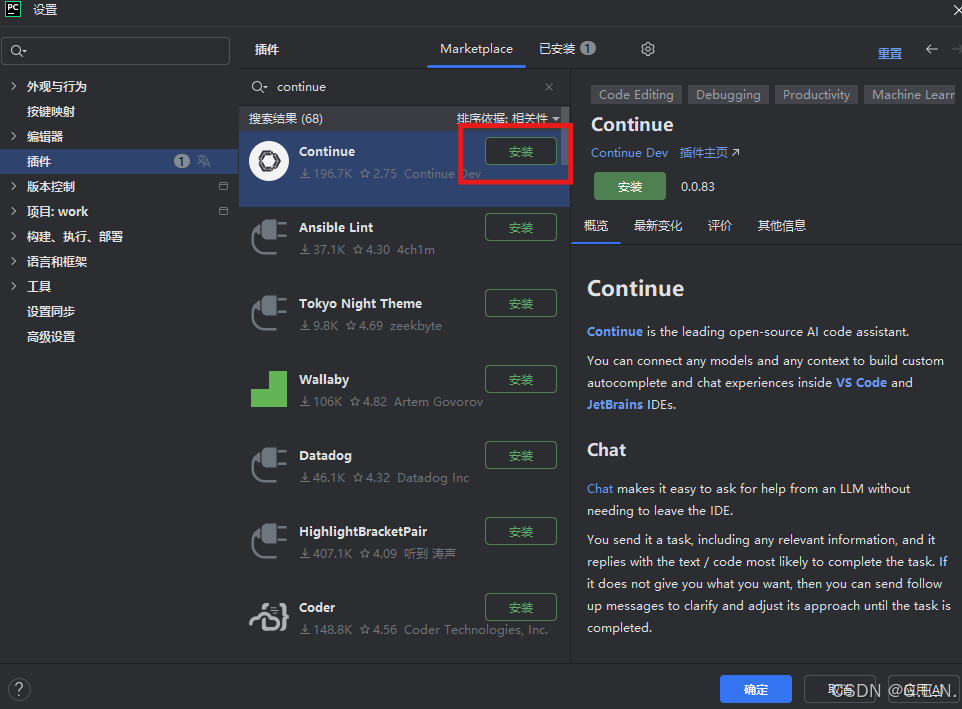
等待插件安装完毕后,点击“应用”,插件安装成功。
设置Continue
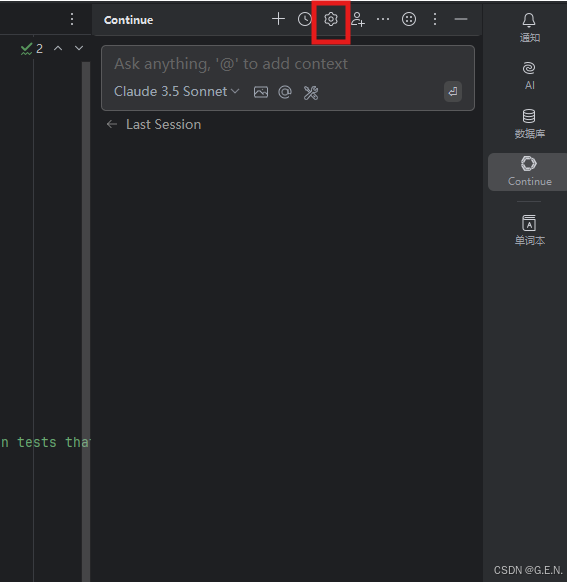
实际处理时,插件安装成功后,在右侧的标签栏中,会显示一个Continue的标签,我们点击即可进入,随后点击设置按键,如下所示图。
点击后,文本编辑区将会弹出设置文件。
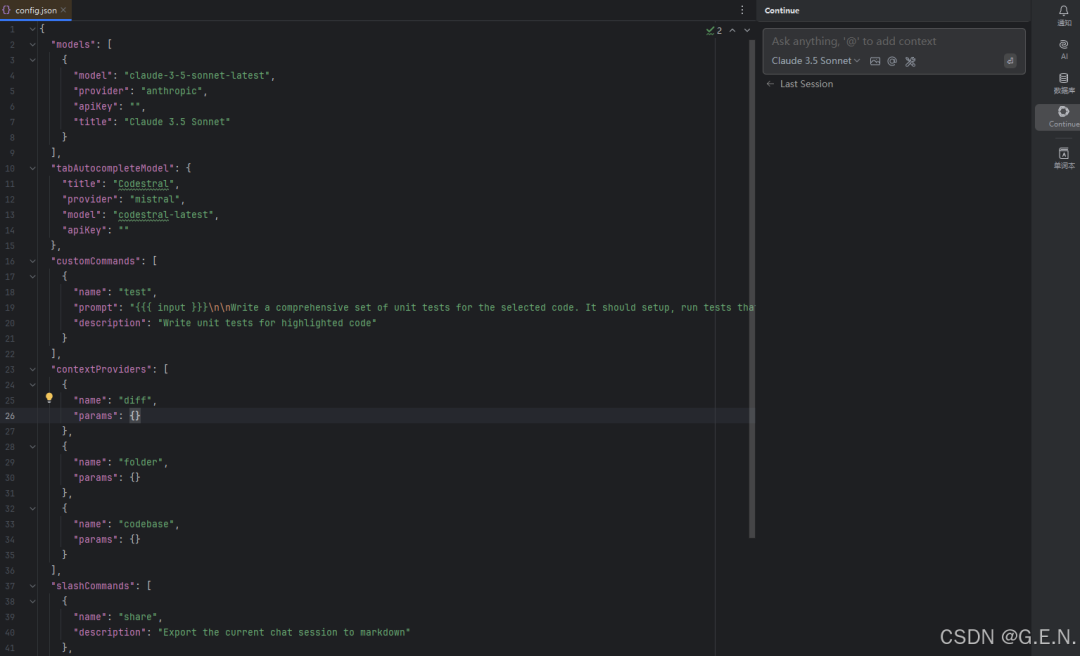
我们对设置文件进行修改,将内容替换为接下来的内容:
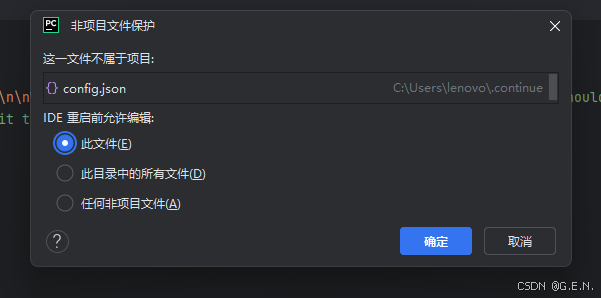
{` `"completionOptions": {` `"BaseCompletionOptions": {` `"temperature": 0.0,` `"maxTokens": 256` `}` `},` `"models": [` `{` `"title": "DeepSeek",` `"model": "deepseek-chat",` `"contextLength": 128000,` `"apiKey": "REDACTED",` `"provider": "deepseek",` `"apiBase": "https://api.deepseek.com/beta"` `}` `],` `"tabAutocompleteModel": {` `"title": "DeepSeek Coder",` `"model": "deepseek-coder",` `"apiKey": "REDACTED",` `"provider": "deepseek",` `"apiBase": "https://api.deepseek.com/beta"` `},` `"customCommands": [` `{` `"name": "test",` `"prompt": "{` `{` `{ input }}}nnWrite a comprehensive set of unit tests for the selected code. It should setup, run tests that check for correctness including important edge cases, and teardown. Ensure that the tests are complete and sophisticated. Give the tests just as chat output, don't edit any file.",` `"description": "Write unit tests for highlighted code"` `}` `],` `"contextProviders": [` `{` `"name": "diff",` `"params": {}` `},` `{` `"name": "folder",` `"params": {}` `},` `{` `"name": "codebase",` `"params": {}` `}` `],` `"slashCommands": [` `{` `"name": "share",` `"description": "Export the current chat session to markdown"` `},` `{` `"name": "commit",` `"description": "Generate a git commit message"` `}` `]``}修改时将会弹出提示,点击确定。
随后,我们将两处apiKey替换为先前保存的API key。
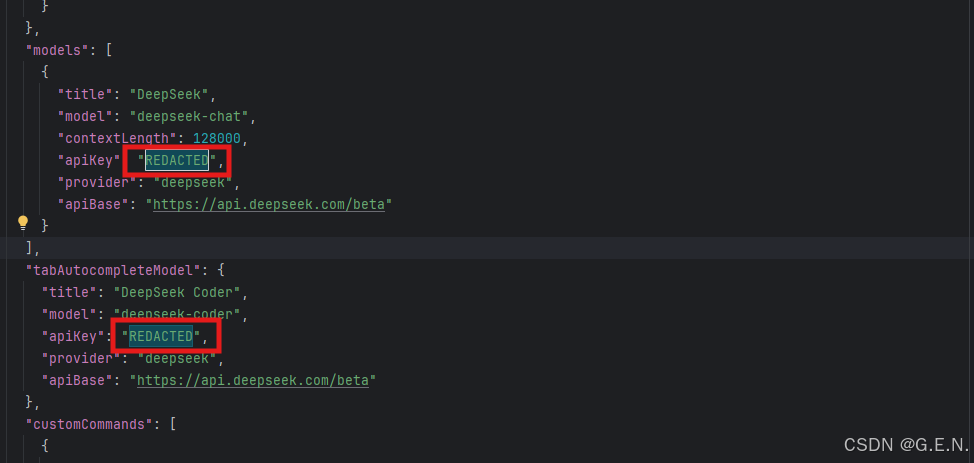
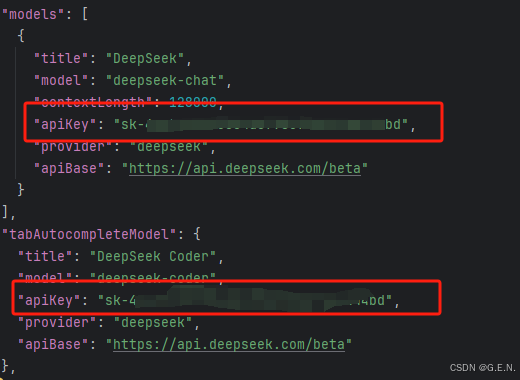
保存文件后,即可开始采用。
结合项目来看,总的来说,PyCharm 接入 DeepSeek这部分内容适合结合实际项目边做边理解。先抓住核心思路,再逐步补上细节和边界处理,最后效果会更稳定,也更容易复用。