


最新下载
热门教程
- 1
- 2
- 3
- 4
- 5
- 6
- 7
- 8
- 9
- 10
实例:Asp.net core WebApi 使用Swagger生成帮助页
时间:2022-06-25 07:13:29 编辑:袖梨 来源:一聚教程网
最近我们团队一直进行.net core的转型,web开发向着前后端分离的技术架构演进,我们后台主要是采用了asp.net core webapi来进行开发,开始每次调试以及与前端人员的沟通上都存在这效率低下的问题,一次在看微软asp.net core官方文档的时候,发现了swagger这个好东西。然后在实际的项目中引入了该技术。我们开发人员测试自己写的api的过程大大得到了简化,前端人员也可以根据我们提供的swagger help pages 自己进行一些前端代码的测试,大大提高了前后端的开发效率。下面我就拿我自己的真实上线项目来一步一步的讲解如何在asp.net core webapi中引入swagger。
一、引入swagger Nuget包
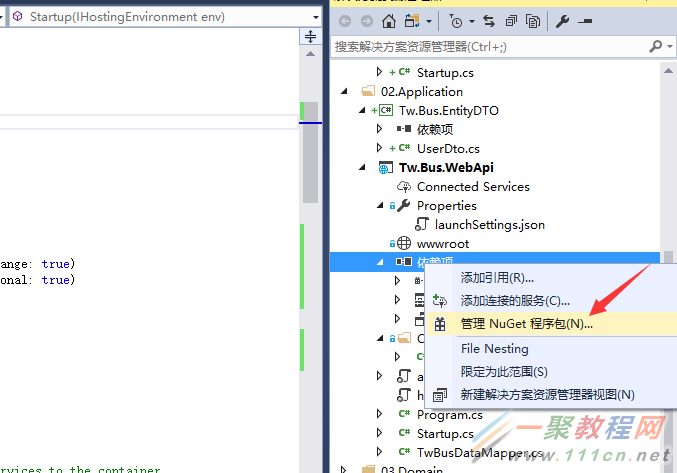
右键点击wepapi项目的依赖项,点击管理Nuget程序包,如下图:
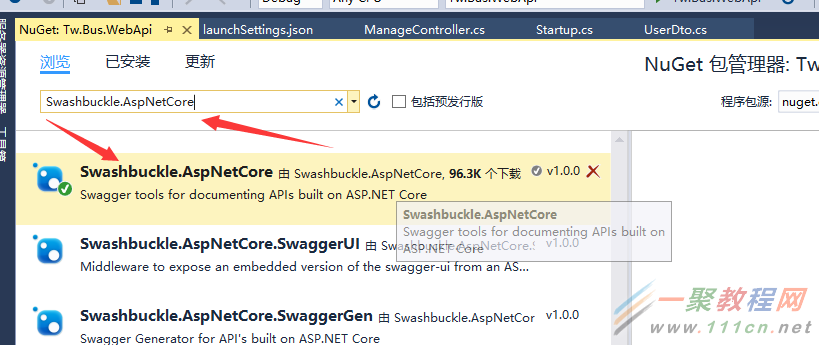
在打开的NuGet包程序管理界面,输入:Swashbuckle.AspNetCore 目前该程序包的版本为1.0.0,点击安装。
安装完后,需要在项目中的Startup.cs文件中进行配置。
二、配置Swagger
打开Startup.cs 文件,在ConfigureServices 方法中,添加如下代码:
s
| 代码如下 | 复制代码 |
|
ervices.AddSwaggerGen(c => { c.SwaggerDoc("v1",newInfo { Version ="v1", Title ="TwBusManagement接口文档", Description ="RESTful API for TwBusManagement", TermsOfService ="None", Contact =newContact { Name ="Alvin_Su", Email ="[email protected]", Url =""} });
//Set the comments path for the swagger json and ui. var basePath = PlatformServices.Default.Application.ApplicationBasePath; var xmlPath = Path.Combine(basePath,"twbusapi.xml"); c.IncludeXmlComments(xmlPath);
// c.OperationFilter }); | |
注意上段代码的最后三行,是我们api描述文档xml的生成地址和文件名,需要在项目的属性中进行配置。如下图:
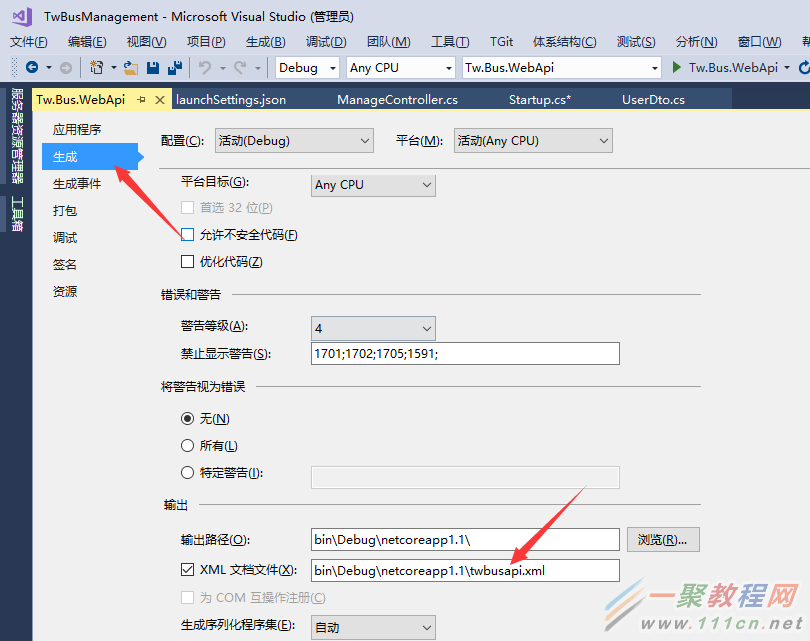
另外上图中,禁止显示警告中,添加1591 代码,可以过滤掉一些类名没有写注释的报警信息。
最后需要在Configure方法中,添加如下代码,注意下面的代码必须添加在 app.UseMvc() 前面:
| 代码如下 | 复制代码 |
|
// Enable middleware to serve generated Swagger as a JSON endpoint. app.UseSwagger();
// Enable middleware to serve swagger-ui (HTML, JS, CSS etc.), specifying the Swagger JSON endpoint. app.UseSwaggerUI(c => { c.SwaggerEndpoint("/swagger/v1/swagger.json","TwBusManagement API V1"); c.ShowRequestHeaders(); }); | |
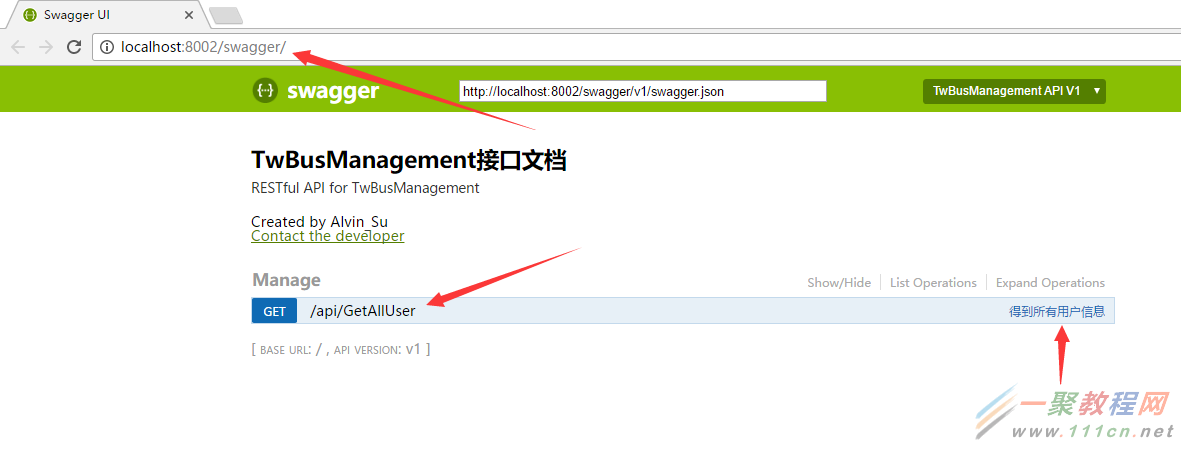
以上配置完后,就可以使用Swagger生成的帮助页面了,运行项目后,在浏览器地址 加上后缀 /swagger就可以跳转到帮助页面:
当然我们开发人员在开发项目的过程中并不想每次都要手动输入地址才能跳转到帮助页面,这样太麻烦。我们可借助visual studio 进行跳转,如下图:
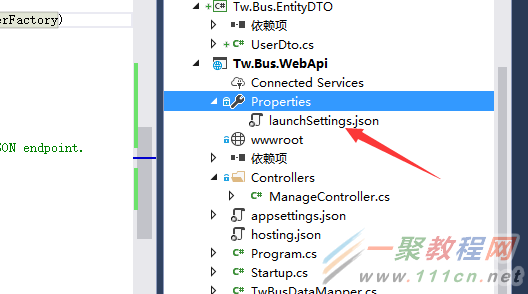
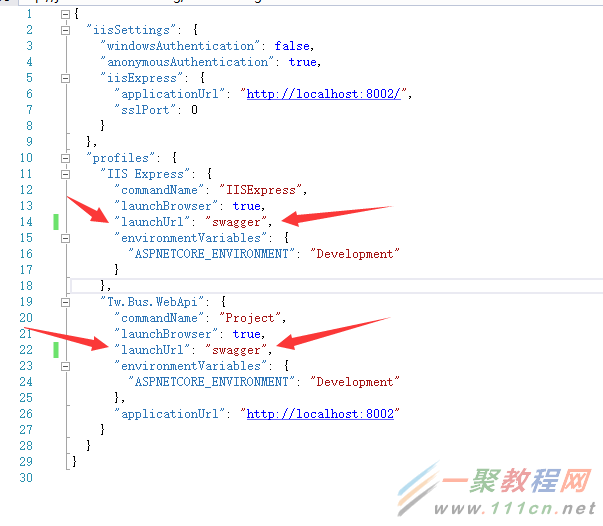
打开 launchSettings.json 文件,把webapi项目的启动路径设置成 swagger。这样每次调试运行项目都会自动跳转到swagger帮助页面
三、Swagger的一些高级用法
Swagger非常强大,不仅仅是一些帮助页面信息,还可以进行api的调试。这样就可以不用借助第三方工具 如:postman,进行webapi的调试。swagger经过配置,还可以输入一些http头部信息,如权限认证信息等。下面就来讲解以下具体的配置。
首先我们需要新建一个类 HttpHeaderOperation,让该类继承IOperationFilter 接口,该接口需引入命名空间:Swashbuckle.AspNetCore.SwaggerGen,实现接口方法Apply 代码如下:
| 代码如下 | 复制代码 |
|
publicclassHttpHeaderOperation : IOperationFilter { publicvoidApply(Operation operation, OperationFilterContext context) { if(operation.Parameters ==null) { operation.Parameters =newList }
var actionAttrs = context.ApiDescription.ActionAttributes();
var isAuthorized= actionAttrs.Any(a => a.GetType() ==typeof(AuthorizeAttribute));
if(isAuthorized ==false)//提供action都没有权限特性标记,检查控制器有没有 { var controllerAttrs= context.ApiDescription.ControllerAttributes();
isAuthorized= controllerAttrs.Any(a => a.GetType() ==typeof(AuthorizeAttribute)); }
var isAllowAnonymous = actionAttrs.Any(a => a.GetType() ==typeof(AllowAnonymousAttribute));
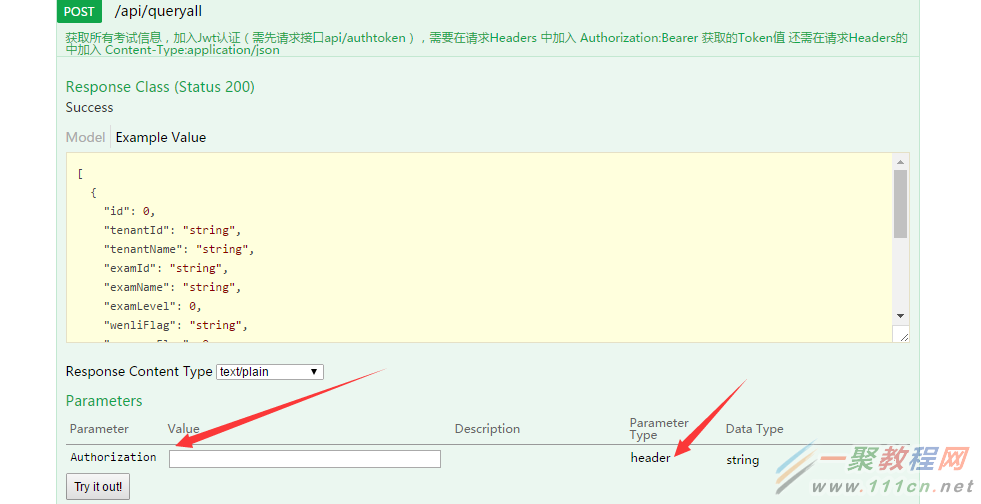
if(isAuthorized && isAllowAnonymous ==false) { operation.Parameters.Add(newNonBodyParameter() { Name ="Authorization",//添加Authorization头部参数 In ="header", Type ="string", Required =false }); } } } | |
然后在 Startup.cs 中的 ConfigureServices 方法,找到之前的AddSwaggerGen 代码段,在最后添加如下代码:
| 代码如下 | 复制代码 |
|
c.OperationFilter
services.AddSwaggerGen(c => { c.SwaggerDoc("v1",newInfo { Version ="v1", Title ="TwBusManagement接口文档", Description ="RESTful API for TwBusManagement", TermsOfService ="None", Contact =newContact { Name ="Alvin_Su", Email ="[email protected]", Url =""} });
//Set the comments path for the swagger json and ui. var basePath = PlatformServices.Default.Application.ApplicationBasePath; var xmlPath = Path.Combine(basePath,"twbusapi.xml"); c.IncludeXmlComments(xmlPath);
c.OperationFilter }); | |
这样,我们允许webapi项目后,就可以输入 Authorization 头部参数了。如下图:
更多关于Swagger的用法可以参考https://gith*u*b*.com/domaindrivendev/Swashbuckle.AspNetCore 以及微软文档:https://docs.mic*r*o*soft.com/zh-cn/aspnet/core/tutorials/web-api-help-pages-using-swagger
以上就是本文的全部内容,希望对大家的学习有所帮助。
相关文章
- Linux Node.js安装步骤怎么做 06-27
- 如何利用ps命令查找进程 06-27
- Overlay网络怎样管理 06-27
- 如何利用Ubuntu Node.js日志实施容量规划 06-27
- 怎样设置Ubuntu Node.js日志格式 06-27
- Ubuntu Node.js日志中怎样分析响应时间 06-27