


最新下载
热门教程
- 1
- 2
- 3
- 4
- 5
- 6
- 7
- 8
- 9
- 10
SpringBoot整合Mongodb实现增删查改代码方法
时间:2022-06-29 01:47:17 编辑:袖梨 来源:一聚教程网
本篇文章小编给大家分享一下SpringBoot整合Mongodb实现增删查改代码方法,文章代码介绍的很详细,小编觉得挺不错的,现在分享给大家供大家参考,有需要的小伙伴们可以来看看。
一、什么是MongoDB
MongoDB与我们之前熟知的关系型数据库(MySQL、Oracle)不同,MongoDB是一个文档数据库,它具有所需的可伸缩性和灵活性,以及所需的查询和索引。
MongoDB将数据存储在灵活的、类似JSON的文档中,这意味着文档的字段可能因文档而异,数据结构也会随着时间的推移而改变。文档模型映射到应用程序代码中的对象,使数据易于处理。MongoDB是一个以分布式数据库为核心的数据库,因此高可用性、横向扩展和地理分布是内置的,并且易于使用。况且,MongoDB是免费的,开源的。
二、在Window10上安装MongoDB
打开MongoDB官网
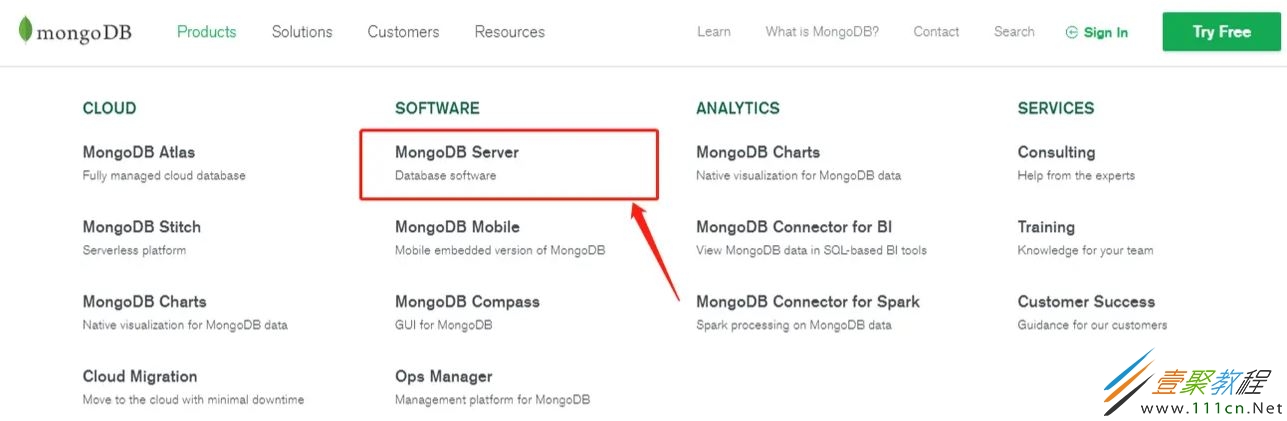
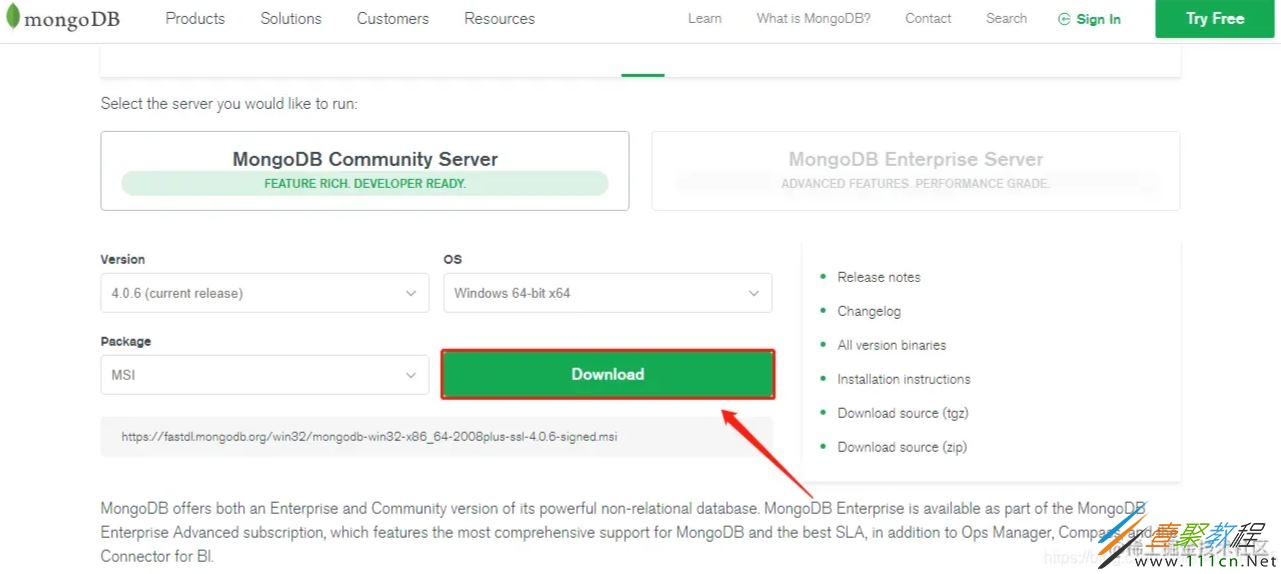
下载MSI版本(安装版)
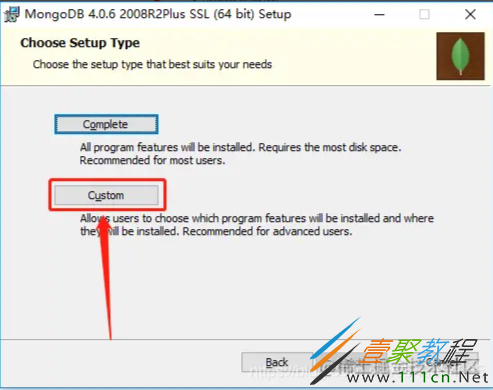
下载的时候选择Custom
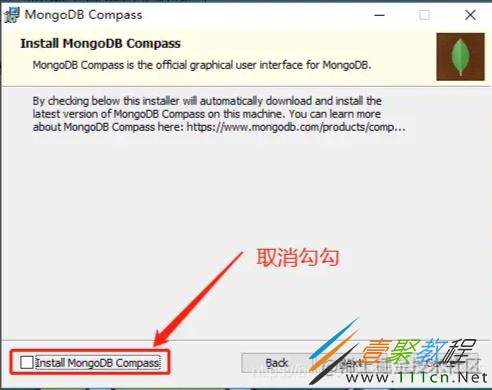
安装的时候,注意不要勾上安装可视化插件,否则安装会非常慢(除非你网速够快)
三、配置MongoDB服务
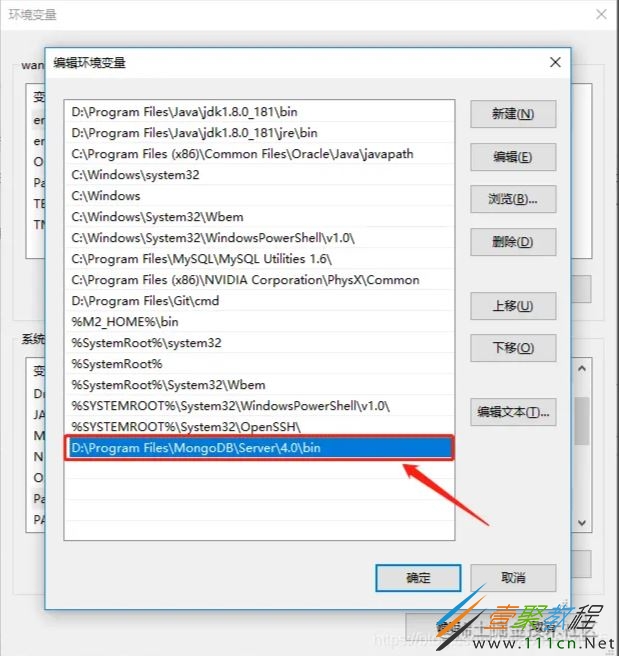
配置环境变量
复制当前路径

我的电脑->右键->高级系统设置->环境变量->系统变量
在系统变量找到Path,编辑,将上面复制的路径增加进去
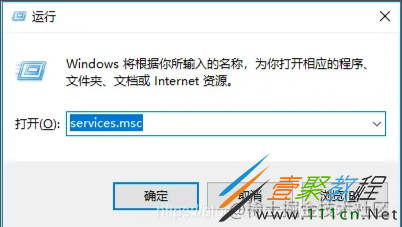
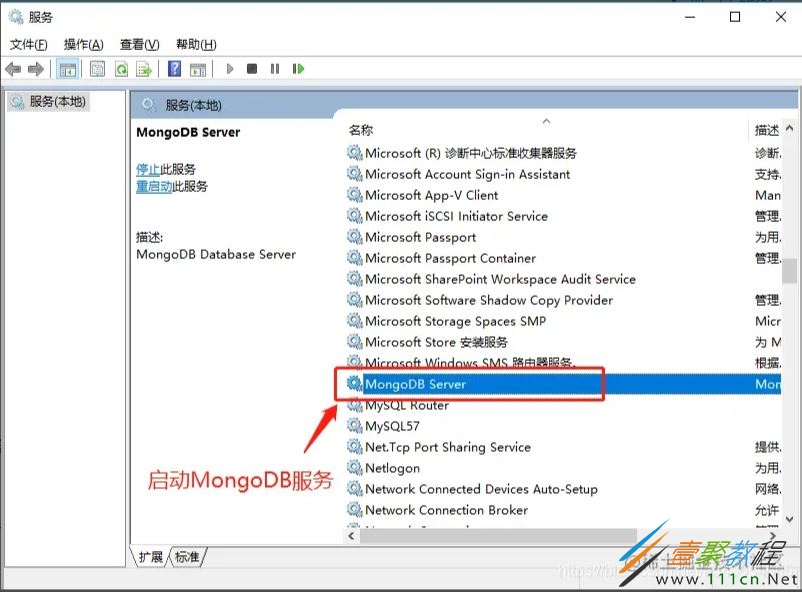
四、启动服务
win+R->输入services.msc
服务启动后,在浏览器输入 127.0.0.1:2701
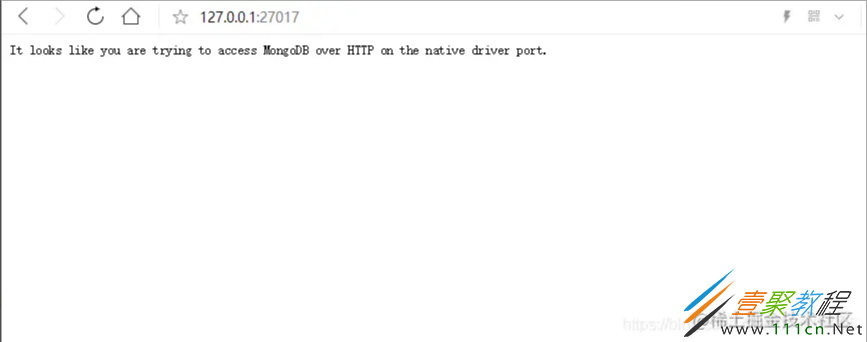
出现这行英语则代表服务启动成功。
五、SpringBoot整合MongoDB
环境准备
操作系统:Window10
IDE:IntelliJ IDEA 2018.2.4
数据库:MongoDB
1)引入依赖
            org.springframework.boot
            spring-boot-starter-data-mongodb
2)在application.yml添加如下配置
spring:
  data:
    mongodb:
      uri: mongodb://localhost/test_mongodb
完整的配置信息如下:
spring:
  data:
    mongodb:
      authentication-database: # Authentication database name.
      database: # Database name.
      field-naming-strategy: # Fully qualified name of the FieldNamingStrategy to use.
      grid-fs-database: # GridFS database name.
      host: # Mongo server host. Cannot be set with URI.
      password: # Login password of the mongo server. Cannot be set with URI.
      port: # Mongo server port. Cannot be set with URI.
      repositories:
        type: # Type of Mongo repositories to enable.
      uri: # Mongo database URI. Cannot be set with host, port and credentials.
      username: # Login user of the mongo server. Cannot be set with URI.
3)新增实体类UserEntity
public class UserEntity {
    @Id
    private String uid;
    private String username;
    private String password;
    public String getUid() {
        return uid;
    }
    public void setUid(String uid) {
        this.uid = uid;
    }
    public String getUsername() {
        return username;
    }
    public void setUsername(String username) {
        this.username = username;
    }
    public String getPassword() {
        return password;
    }
    public void setPassword(String password) {
        this.password = password;
    }
    @Override
    public String toString() {
        return "UserEntity{" +
                "uid='" + uid + ''' +
                ", username='" + username + ''' +
                ", password='" + password + ''' +
                '}';
    }
}
4)新建测试。这里我用navicat作为MongoDB的可视化工具进行查看。
测试一:插入操作
    @Autowired
    private MongoTemplate mongoTemplate;
    @Test
    public void saveUser(){
        UserEntity userEntity1 = new UserEntity();
        UserEntity userEntity2 = new UserEntity();
        UserEntity userEntity3 = new UserEntity();
        userEntity1.setUid("111");
        userEntity1.setUsername("用户1");
        userEntity1.setPassword("密码1");
        userEntity2.setUid("222");
        userEntity2.setUsername("用户2");
        userEntity2.setPassword("密码2");
        userEntity3.setUid("333");
        userEntity3.setUsername("用户3");
        userEntity3.setPassword("密码3");
        mongoTemplate.save(userEntity1);
        mongoTemplate.save(userEntity2);
        mongoTemplate.save(userEntity3);
    }
数据库信息:
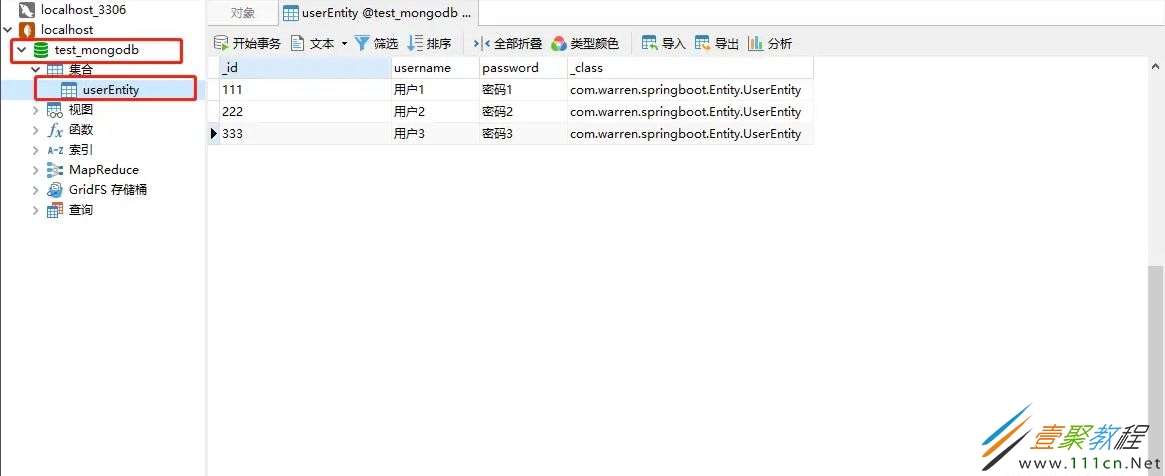
可以看到,MongoDB自动创建了数据库以及通过实体类生成了集合(也就是我们经常说的数据表),而且我们已经通过MongoTemplate往数据库的userEntity集合插入了几条文档(也就是插入了几条记录)。而 _id 为主键,_class 则为实体类包名+类名
测试二:查询操作
    @Autowired
    private MongoTemplate mongoTemplate;
	@Test
    public void findUserByUserName(){
        String username = "用户1";
        Query query=new Query(Criteria.where("username").is(username));
        UserEntity user =  mongoTemplate.findOne(query , UserEntity.class);
        System.out.println(user);
    }
输出结果:
UserEntity{uid='111', username='用户1', password='密码1'}
测试三:更新操作
  @Autowired
    private MongoTemplate mongoTemplate;
	@Test
    public void updateUser(){
        UserEntity userEntity = new UserEntity();
        userEntity.setUid("111");
        userEntity.setUsername("更新后的用户名");
        userEntity.setPassword("更新后的密码");
        Query query = new Query(Criteria.where("_id").is(userEntity.getUid()));
        Update update = Update.update("username",userEntity.getUsername()).set("password",userEntity.getPassword());
        //更新返回结果集的第一条
        mongoTemplate.updateFirst(query,update,UserEntity.class);
        //更新返回结果集的所有
        //mongoTemplate.updateMulti(query,update,UserEntity.class);
    }
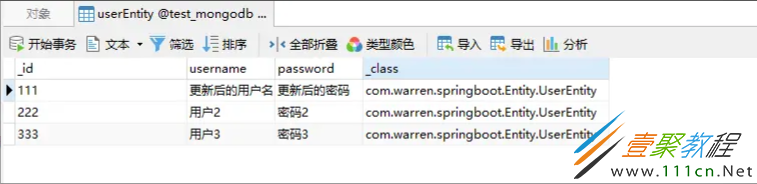
更新后数据库如图所示:
测试四:删除操作
    @Autowired
    private MongoTemplate mongoTemplate;
	@Test
    public  void DeleteByUserId(){
        String id = "222";
        Query query=new Query(Criteria.where("_id").is(id));
        mongoTemplate.remove(query,UserEntity.class);
    }
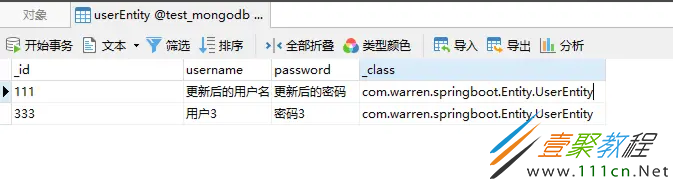
删除后数据库如图所示:
相关文章
- 《星球工匠》电路板获得方法 04-19
- 《长安小时光》下载方法方法 04-19
- 《下一站江湖2》情比金坚作用介绍 04-19
- 《星露谷物语》获得地板方法 04-19
- 《下一站江湖2》虞令羽之墓开启方法 04-19
- 《下一站江湖2》神刀鬼谕获取方法 04-19